


Blooket has taken the world of educational gaming by storm, offering a fun and engaging way for teachers to review content and assess student knowledge. If you’ve played a game but are ready to take the next step and host one for your own classroom or group, you’ve come to the right place. Hosting a game is simple, and this guide will walk you through every step, from selecting a question set to launching the game and analyzing the results.
This post will provide clear instructions on how to host a Blooket game. We will explore the different game modes available, explain how to find or create question sets, and offer tips for making your game session a success. By the end, you’ll be able to confidently lead your own Blooket games and create an exciting learning environment for your students.
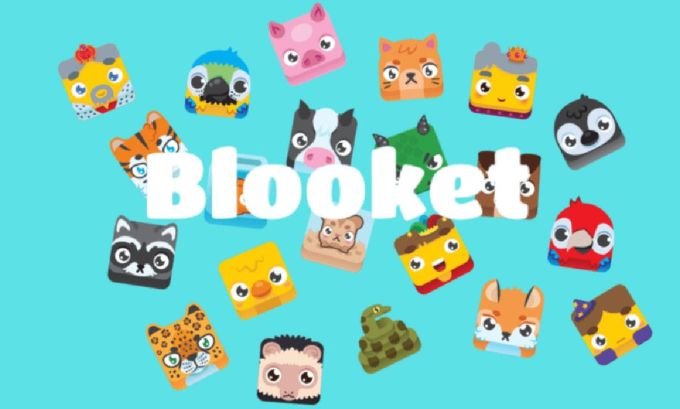
What is Blooket?
Before we jump into hosting, let’s quickly cover what Blooket is. Blooket is an online learning platform that blends trivia and gaming. Teachers host games using “question sets,” and students join using a unique game code on their own devices. What makes Blooket special is its variety of game modes. Instead of a standard quiz format, students can find themselves racing, running a café, or mining for gold, all while answering review questions. This gamified approach keeps students motivated and makes learning feel less like a chore and more like play.
Step-by-Step: How to Host a Blooket Game
Hosting a Blooket game is a straightforward process. Follow these steps to get your first game up and running in minutes.
Step 1: Sign Up or Log In
First, you’ll need a Blooket account. If you don’t already have one, head to blooket.com and sign up for a free teacher account. The process is quick and only requires a valid email address or Google account. If you already have an account, simply log in to your dashboard.
Step 2: Find a Question Set
Once you’re logged in, you’ll land on your dashboard. From here, you need to choose a question set for your game. You have two options: use a pre-existing set or create your own.
- Discover Sets: The easiest way to get started is by using a question set created by another user. Click the “Discover” tab at the top of the page. You can search for any topic imaginable, from “long division” to “state capitals.” The search results will show you a list of public question sets. Click on a set to preview the questions and ensure they align with your curriculum.
- Create Your Own Set: If you can’t find the perfect set or want to tailor questions to your specific lesson, click the “Create” tab on your dashboard. You’ll need to add a title, a description, and a cover image for your set. From there, you can add questions one by one. You can either type them in manually or import them from a spreadsheet. This is a great way to create highly customized review games.
Step 3: Select a Game Mode
After you’ve selected your question set, it’s time for the fun part: choosing a game mode. Click the “Host” button on the question set page. This will take you to a screen displaying all the available game modes.
Blooket offers a wide variety of modes, each with a unique objective. Some are competitive, while others encourage teamwork. The best mode for your class will depend on your learning goals, the time available, and the general energy of your students.
Here’s a quick overview of some popular game modes:
| Game Mode | Objective | Best For |
|---|---|---|
| Gold Quest | Answer questions to earn gold and steal it from other players. | High-energy, competitive review. |
| Tower Defense | Answer questions to build towers and defend against waves of enemies. | Strategic thinking and longer class periods. |
| Café | Answer questions to serve food to customers and restock supplies. | Fast-paced, individual practice. |
| Factory | Answer questions to unlock and upgrade “Blooks” to produce cash. | Strategy and long-term engagement. |
| Racing | Answer questions correctly to advance your Blook to the finish line. | Quick, simple competition. |
| Battle Royale | Face off against other players in a last-player-standing quiz battle. | Individual competition and test prep. |
Click on your desired game mode to proceed.
Step 4: Configure Game Settings
Each game mode has its own set of configurable settings. After selecting a mode, click “Host Game” to open the settings page. Here, you can decide how the game will run. Common settings include:
- Time Limit/Goal: You can set the game to end after a certain amount of time or once a player reaches a specific goal (e.g., collecting a certain amount of gold).
- Allow Late Joining: Decide if students who arrive late can still join the game.
- Use Random Names: This option assigns random names to students, which can be useful for anonymity.
- Number of Questions: Some modes allow you to specify how many questions from the set will be used.
Review the settings and adjust them to fit your needs. Once you’re ready, click “Host Now.”
Step 5: Launch the Game and Invite Students
After clicking “Host Now,” Blooket will generate a lobby screen on your device. This screen displays a unique Game ID code and a QR code.
Instruct your students to go to blooket.com/play on their own devices (laptops, tablets, or phones). They will be prompted to enter the Game ID and a nickname. As students join, their avatars will appear in the lobby on your screen.
Once all your students are in the lobby, you can click the “Start” button on your screen to begin the game.
Step 6: Monitor Progress and Conclude the Game
While the game is in progress, your screen will show a leaderboard or a general overview of the game’s status. You can monitor student progress and see who is in the lead.
When the time is up or the game’s goal is met, the game will automatically end. A final podium will display the top three players.
After the game, you can view a detailed report by clicking the “View Report” button. This report shows how each student performed, including which questions they answered correctly and incorrectly. This data is incredibly valuable for identifying areas where students might need additional support.
Final Thoughts on Hosting
Hosting a Blooket game is an excellent way to boost engagement and make learning memorable. By following these steps, you can easily integrate this dynamic tool into your teaching practice. Don’t be afraid to experiment with different question sets and game modes to find what works best for your students. The more you use it, the more you’ll discover the platform’s potential for creating a fun and effective learning environment.
So, go ahead and host your first game. You might be surprised at how much your students enjoy reviewing material when it feels like they’re just playing a game.
Frequently Asked Questions (FAQ)
Can I host a Blooket game for free?
Yes! Blooket offers a generous free plan that allows you to host games with all the standard features. There are paid plans (Blooket Plus) that offer enhanced features like detailed game reports and higher player limits, but the free version is fully functional for most classroom needs.
Do my students need accounts to play?
No, students do not need to create accounts to join a game you are hosting. They only need the Game ID code to join via the Blooket play page.
How many players can join a Blooket game?
With a free account, you can host games for up to 60 players. Paid plans allow for larger groups.
Can I use Blooket for remote learning?
Absolutely. Blooket is perfect for remote and hybrid learning environments. You can share your screen during a video call to show the lobby and game progress, while students play on their own devices from home.
What is the difference between hosting a live game and assigning homework?
When you host a game, it’s a live, synchronous event where all students play at the same time. When you assign homework (“HW”), students can play the game on their own time, up until a deadline you set. This is a great option for asynchronous practice.
For a smarter classroom experience, check out Tokyo Mart—where education meets innovation with tools and supplies for modern learners.