


Blooket has taken classrooms by storm, transforming traditional learning into an exciting, game-based experience. Its live game feature allows teachers to engage students in real-time, fostering a competitive yet collaborative environment. If you’re new to the platform or simply want to master the art of hosting, you’ve come to the right place.
This guide will walk you through everything you need to know to host a Blooket game live. We’ll cover the step-by-step process of setting up and launching a game, explore the different game modes available, and share tips for making your sessions as effective and fun as possible. By the end, you’ll be ready to host engaging Blooket games that your students will love.
What is Blooket?
Blooket is an online learning platform that uses games to help students review and practice educational material. Teachers create question sets, known as “Blooks,” which can then be used in various game modes. What makes Blooket unique is its combination of quizzes and captivating gameplay mechanics. Students answer questions correctly to earn points, power-ups, or advantages in the game, keeping them motivated and focused on the learning content.
The platform offers two primary ways to play: live and as homework. The live mode is designed for real-time classroom interaction, where everyone plays together, while the homework mode allows students to complete assignments at their own pace.
How to Host a Blooket Game Live: Step-by-Step
Hosting a live game is a straightforward process. Once you have a question set ready, you can launch a game in just a few minutes.
Step 1: Log in and Choose a Question Set
First, head to the Blooket website and log in to your teacher account. From your dashboard, you can either select one of your existing question sets or find a new one using the “Discover” feature. The Discover page lets you browse thousands of sets created by other educators, which you can duplicate and customize for your own class.
Once you find a set you want to use, click on it.
Step 2: Select the “Host” Option
On the question set’s page, you’ll see two main options: “Host” and “Solo.” To start a live game for your class, click the Host button. This will take you to the game mode selection screen.
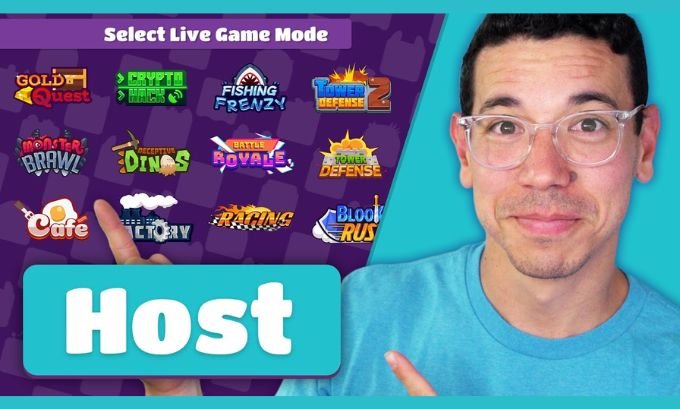
Step 3: Choose a Live Game Mode
Blooket offers a variety of game modes, each with its own unique theme and objective. Some are designed for quick, fast-paced action, while others encourage strategy and teamwork.
Here’s a quick overview of some popular live game modes:
| Game Mode | Objective | Best For |
|---|---|---|
| Gold Quest | Answer questions to open chests and steal gold from other players. | Individual competition and a bit of friendly chaos. |
| Tower Defense | Strategically place towers to defend against waves of enemies. | Strategic thinking and long-term planning. |
| Classic | A traditional quiz format where speed and accuracy are key. | Quick reviews and straightforward assessments. |
| Blook Rush | A fast-paced team game where players defend and attack towers. | Team-based competition and collaboration. |
| Crypto Hack | Mine for cryptocurrency and hack other players. | Individual strategy and risk-taking. |
| Factory | Manage a factory by answering questions to produce Blooks. | Long-term strategy and resource management. |
Select the game mode that best fits your lesson goals and your students’ interests.
Step 4: Configure Game Settings
After choosing a game mode, a settings window will appear. Here, you can customize the game’s duration and other specific rules. Common settings include:
- Time Limit: Set how long the game will last.
- Allow Late Joining: Decide if students can join after the game has started.
- Use Random Names: Enable this to assign fun, random nicknames to students for anonymity.
- Number of Questions: Some modes let you specify the number of questions in the game.
Review the settings and click Host Now when you’re ready.
Step 5: Invite Students to Join
Blooket will generate a unique Game ID and a QR code. Project this screen for your students to see. They can join the game in two ways:
- Go to play.blooket.com and enter the Game ID.
- Scan the QR code with a phone or tablet.
As students join, their assigned Blooks (avatars) will appear in the lobby. You can see a list of participants to ensure everyone is present before you begin.
Step 6: Start the Game!
Once all your students are in the lobby, click the Start button to begin the game. The main screen will display a leaderboard and live updates, while students answer questions on their own devices. You can monitor progress and enjoy watching the competition unfold!
Tips for a Successful Live Blooket Session
Hosting a game is easy, but making it a truly impactful learning experience requires a bit of thought. Here are some tips to get the most out of your live Blooket sessions:
- Match the Game Mode to Your Goal: Are you doing a quick knowledge check? Classic mode is perfect. Want to encourage deeper strategic thinking? Try Tower Defense or Factory. Choosing the right mode can significantly influence student engagement.
- Keep It Short and Sweet: While longer games can be fun, student attention spans can wander. Games lasting 5-10 minutes are often ideal for maintaining high energy and focus.
- Review Questions Afterward: After the game, take a few minutes to go over the questions, especially those that many students got wrong. This reinforces the learning and clarifies any misconceptions.
- Mix Up the Game Modes: Don’t stick to just one game mode. Variety keeps things fresh and exciting. Let students vote on which mode they want to play next to give them a sense of ownership.
- Encourage Good Sportsmanship: Some game modes, like Gold Quest, involve “stealing” from other players. Remind students that it’s all in good fun and part of the game.
Frequently Asked Questions (FAQ)
Can students play Blooket without a code?
For live games hosted by a teacher, a Game ID is required to join. However, if a teacher assigns a question set as homework, they can share a link that allows students to play without a code.
Is Blooket free for teachers?
Yes, Blooket offers a robust free plan that includes access to all game modes and the ability to host games for up to 60 students. There are paid plans (Blooket Plus) that offer enhanced features like detailed game reports, but the core functionality is completely free.
What devices do students need to play?
Students can play Blooket on almost any device with a web browser, including laptops, Chromebooks, tablets, and smartphones. This flexibility makes it easy to implement in any classroom, regardless of the technology available.
How do I find good question sets on Blooket?
The “Discover” page is your best friend. You can search by keyword, subject, or grade level. Look for sets with a high number of plays and a good like-to-dislike ratio. You can also preview the questions to ensure they are accurate and appropriate for your students.
Start Hosting Today
Blooket offers a fantastic way to bring energy and excitement to your classroom. By turning review sessions into engaging games, you can boost student motivation, participation, and, most importantly, learning. Now that you know how to host a Blooket game live, you have all the tools you need to create memorable and effective educational experiences.
So, go ahead and choose a question set, pick a fun game mode, and get ready to see your students light up with excitement.
For teachers looking to add even more fun and cultural flair to their classrooms, Tokyo Mart offers unique items that spark curiosity and creativity.